December 1, 2021

How to Care for your New Plant Purchase

 Hello! 

If you've landed here, you've probably made a purchase or received a gift from The Plant Chick.
So, what's next?!  If you're thinking "How do I take care of this thing?," you've come to the right place!

Regardless of which type of plant you're caring for, your first considerations when bringing home a new plant should be sunlight, water, and drainage.
(I dive deeper into these and other factors, like fertilizer, soil pH, pests, diseases, etc in this blog, but today we're gonna keep it short-ish and sweet.) 


Light

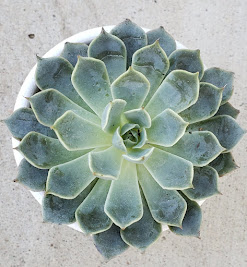
Bright, indirect light is best for most houseplants, so placing them near a window, or in a window that receives only morning sun will work for most houseplants.  For cacti and succulents, outside is best. Many cacti will love full sun, but most succulents look their best when grown in part sun or morning sun.  If you are growing them indoors, you'll want to put them in one of your brightest windows or provide supplemental lighting, like this adjustable desk grow light. To prevent damage to your outdoor succulents, be sure to bring them indoors or cover them up during freezing weather.

Water/Drainage


Watering is going to depend greatly on the species of your plant, so first, find out if your plant type likes to be damp, dry, or in between, and check if your plant's container has a drainage hole. 

As a general rule, check the soil's moisture by sticking your finger 1" into the top of the soil.  If the soil feels damp at this level, there's no need to water.  If it's dry, it's probably time to water. (You can also use something like this moisture meter instead of your finger.). Cacti and succulents may need to dry out even more than this.

When your plant is ready for a drink, apply the water to the soil in the root area of the plant and try not to wet the leaves or the crown (where all the stems come together in the center of some plants).  Pour in the water and allow it to flow through the soil and out the drainage hole.  If your plant is very dry or wilted, you can allow the extra water to collect in a saucer, bowl, or your sink and leave the bottom of the pot soaking in it, with its drainage hole in the water, for about 30 minutes.  
If your pot does not have a drainage hole, you'll need to be extra careful not to water too much, since too much water will cause your plant's roots to become soggy and eventually rot, which could be fatal for your plant.

For plants in containers without a drainage hole, apply just a small amount of water and allow it to soak in and distribute through the soil.  Check the soil after several minutes to see if it needs more.  We aren't shooting for soggy soil here, just damp, like a squeezed-out sponge.

For cacti and succulents without drainage -- be very careful!  I find it best to use a spray bottle to water them, since the soil doesn't need to be fully saturated.  Err on the side of too little water vs too much water.  You can always add a little more, but you can't take it back out.

If having no drainage in your container makes you nervous, another option is to transplant your plant into an inexpensive nursery pot with drainage holes (or a repurposed sour cream container with holes poked in the bottom) and then place it inside the decorative container that has no drainage holes.  With this set up you can pull the plastic pot out for watering, and put it back in when you're done.


I hope that helps get you started! 
Please be sure to share a pic of your new plant baby with our little community of plant lovers in The Plant Chick Shop and keep us posted as it grows! 

If you liked this article, you'll like this one too. 

February 19, 2019

Chill Out, Peaches!


Yesterday I noticed the first peach blossoms of the season on one of my peach trees, and that got me thinking about the topic of "chill hours".  For today's blog I'll be talking mostly about peaches, but the concepts still apply to many other types of trees.

What are chill hours?


The simple answer is the amount of time that the outdoor temperature is above freezing but below 45* F, which is especially important for fruit and nut trees.


 What does that mean for my fruit trees?


For trees like peaches, which shed their leaves each fall, falling temperatures are one of the signals that winter is coming**.
But how does the peach tree know when spring is coming?  Experiencing a critical number of chill hours -- remember, that's above freezing, but below 45* F -- is a signal for the tree to wake up from its winter hibernation.  We call this "breaking dormancy" in the plant world.

**Kudos to you if you caught that Game of Thrones reference.


My poor peach tree thought it was spring yesterday.  Today it's in the 40's.


How many chill hours does my tree need?


It's important to purchase fruit and nut trees that are matched to the number of average chill hours in the area where you live.  You can usually get this information from your state or county extension agency's website, or from any good nursery in your area.

Planting a tree that requires fewer chill hours than your area typically gets means the tree may think winter is over before it actually is, therefore, it may bloom too soon, and those blossoms are likely to get frozen and damaged -- and if the blossoms freeze off, that means no peaches.
This is what's happening with one of my peach trees right now.  It got plenty of chill hours, so when the weather warmed up for a few days, it "thought" it was spring!

Conversely, if you plant a variety that requires more chill hours than it will get in your area, your tree will be "confused" and this confusion can result in other problems, like deformed fruit.

Here in Central Texas I have seen nurseries selling peach varieties requiring anywhere between 200-750 chill hours.

Texas A&M's guide for peaches categorizes peaches as low-chilling (150-400 hrs), medium-chilling (450-650 hrs), or high-chilling (700-1000 hrs).


Best peach varieties for Central Texas


Medium-chill varieties are going to be your best bet!  Personally I've had the best luck with "Texstar", and "La Feliciana", which need around 450 and 600 chill hours, respectively.  If you have the space, I recommend doing what I did.  Planting at least 2 varieties with different chilling requirements, because some years one tree will have the better harvest, and other years the other tree will.

If you're in the Austin area, I recommend avoiding low-chill varieties with names like "Florida", "Gulf", or "Tropic".

Text BLOG to 512 540 8785 to be notified of new blogs, or follow on Facebook or Instagram!

February 14, 2019

Houseplants for Plant Killers


Hi guys!
I took a bit of a break from blogging during the colder months, but I'm so ready for spring, and my blog is also ready to grow, too!

I was invited to speak to 2 garden clubs in the next month about the topic of Houseplants!
The general consensus is that people kill them and don't know why, so in this post I'll be addressing the following topics in regard to houseplants.


  • General care, including:
  • Lighting, water, fertilizer, soil, containers/drainage
  • Common mistakes
  • Common pests/diseases
  • Plants to improve indoor air quality
  • Easiest low-maintenance house plants
  • Plants beginners should stay away from

Light

All plants prefer bright light, some just tolerate low light better than other.
When I am asked "What kind of light does this plant need?", I generally give the same answer.
Bright, indirect light is my go-to, regardless of species. Some plants can handle direct sunlight through a window, but there are other factors to consider, like how hot the plant will get when placed directly in front of a window. Again, the takeaway here is that all plants prefer bright light, and bright, indirect light is always a safe bet. Your plants will let you know if they aren't getting enough sun if its stems start stretching toward light, a phenomenon called etiolation.

Fertilizer

There are specialty fertilizers available for some plants, like orchids and African violets, but in most cases those are not necessary. For most houseplants, an organic, all-purpose fertilizer with a balance of N-P-K (nitrogen, phosphate, potassium) is going to work fine. I prefer organic liquid formulas -- I LOVED Ladybug brand products, produced here in central Texas, but unfortunately, these products are no longer produced, so I've been bouncing between products in order to find a new favorite. I'm currently testing out organic formulas from Agrothrive, Espoma, Medina, and Dr. Earth. If you are sensitive to smells, stay away from fish emulsion or liquid seaweed in the ingredients, or simply use them outside and allow your plants to dry before returning them to the indoors. Organic fertilizers won't contain things like synthetic urea, which can "off-gas" into ammonia, an indoor air pollutant -- more on that later! They'll also help you avoid the salt accumulation that can happen with repeated use of fertilizers like that popular blue powdered synthetic fertilizer, which is detrimental to important soil microbes, and eventually can be damaging to your plant.
Liquid Seaweed is another wonderful addition to your gardening toolbox, since it contains 60+ trace elements present in the same concentration as plants (since seaweed is a plant!), so it's readily absorbed by plants, and it can be used in combination with your fertilizer. Try it on your outdoor plants, too -- it's amazing! As a bonus, liquid seaweed repels some bugs and improves heat and drought tolerance, reducing water usage by up to half, which means your houseplants will be more forgiving if you forget to water them! *Remember liquid seaweed can be kinda stinky, so it's best to apply outdoors.*

Water

My general rule of thumb is simple. Let the soil dry out between waterings. How dry is where things can get confusing. Some plants, like Sansevieria (a.k.a. Snake Plant or Mother-in-law's Tongue) thrive when the soil is almost crispy before the next watering. Other plants, like Spathiphyllum (a.k.a. Peace Lily) prefer to dry out only slightly. Knowing how much to water your houseplants will come with experience, but some plants are more forgiving than others, so stick with those easy plants until you get the hang of it. (I've made you a list toward the end of the blog!) Overwatering kills more houseplants than underwatering. If you're unsure if it's time to water, it's safer to wait another day, rather than to cause the plant's soil to stay wet for too long. When there is too much water in the soil, there usually isn't enough oxygen around the roots, and that is where your problems start. When the soil is too wet, the roots begin to rot, and that can further add to the confusion because a plant with rotten roots often looks exactly like a thirsty plant. When the roots are damaged (rotten), they can't deliver water to the plant, therefore, it wilts, just like a plant without water. Rainwater is always better than tap water, if that's an option for you. And of course, remember to water the soil, not the leaves.

Containers


Poor drainage contributes to root rot, so it's important to choose a container with drainage holes.  Use a saucer beneath the container to manage any water/soil that leaks from the drainage holes.
If your favorite container doesn't have a drainage hole, and drilling a hole isn't an option, you can opt for the pot-in-pot method.
Keep your plant in a container with drainage holes, and set it inside the pot that does not have drainage holes.  The outer pot will act as the saucer.


New Earth Top Shelf Potting Soil


Soil

*Steps up onto soapbox.* Potting soil is a pet-peeve of mine. I cringe when I see someone purchase a beautiful plant and then reach for a $2 bag of potting soil (or even worse, a $1 bag of topsoil -- double cringe!). Most people don't understand the difference, and I feel like it's my responsibility as the professional to educate people about this. Have you ever heard the saying "you get what you pay for"? This seems to be especially true for soil. A good quality potting soil will be made with a variety of ingredients, like peat moss, perlite, compost, bark,, etc., and when the bag of soil is dry it shouldn't weigh 40 lbs. (If it's sold by weight, that's your first clue to avoid it!)  My current favorite potting soil is New Earth's Organic Top Shelf Potting Soil. I usually buy mine at H-E-B, and I use it for all my indoor and outdoor potted plants. (New Earth also makes some great products for the garden. I also love that New Earth's Potting Soil comes enriched with Medina's Growing Green Fertilizer, another Texas product, and it's a great value at around $5 per bag.
Houseplant "Don'ts"

  1. Don't overwater. Most houseplant deaths are water related.
  2. Don't leave plants in their original nursery container. They're almost always "root bound" and ready for a larger container.
  3. Don't forget to fertilize. Fertilize every 1-3 months, depending on the formulation. If you're using organics (and I hope you are!) usually that's once a month for liquid. Check the packaging if you aren't sure.
  4. Don't panic. Remember, when you bring a new plant home it's going to experience many changes -- temperature, light, soil, water, humidity, and damage to the roots (when you repot them), so it's understandable that a plant might shed a few leaves. Don't panic and make matters worse by relocating the plant every time it drops a leaf. Following the tips on lighting, watering, fertilizer, etc. will help you avoid most major problems.


Common pests and diseases


Disease and pest problems on houseplants, while not rare, are less common than they are for outdoor plants, and when they appear they are usually a symptom of a larger problem (water stress, root bound, etc.)
  1. Spider mites. These tiny critters suck the life juice from leaves, leaving them looking faded and decorated with fine strands of spider webbing. If you aren't sure if your plant has spider mites, tap the leaves onto a white piece of paper and then check it for tiny, moving dots (usually red). These seem to be more common on thirsty plants, especially if you frequently wait for the plant to wilt before watering it.
  2. Aphids. You'll usually see the bugs on leaves and stems. Their biggest giveaway is a sticky, shiny residue left on leaves.
  3. Gnats. Most common in soggy plants. Cut back on the watering and they'll often go away. You can also spray the soil with insecticidal soap to speed up the process.
  4. Scale insects. Usually hard, not moving, waxy bumps on plant stems (sometimes leaves, too). They pop off easily with a fingernail, or you can squish them or kill them with rubbing alcohol on a cotton swab.
  5. Fungus - More common in humid conditions, but generally less common in the home than bugs. Usually manifests as a white, black, or rusty powder on leaves, or as leaf spots.

Treatment


Evaluate the plant for underlying problems that could be contributing to disease or pest issues. Does the plant need water more frequently? Are the roots running out of space? Is it sitting in soggy soil? Correct the issues instead of only treating the symptoms. When you do treat pests/diseases, choose the least toxic solution. For pests, sometimes more than 1 treatment is necessary, since the pest's eggs may hatch after the treatment. This doesn't mean the treatment didn't work.
  1. Insecticidal soap.  This is my first choice for pests, because it is a low-toxicity product, but it still does a great job.  
  2. Neem oil.  This is my first choice for scale insects. If you have been unsuccessful in treating for other pests several times with insecticidal soap, try neem oil.  Warning: Oils get hot when exposed to sunlight (think of people tanning on the beach with coconut oil), so don't use this on plants that are exposed to direct sunlight when temperatures are 90 degrees or higher.
    Neem oil also works well as a fungicide.
  3. Pyrethrins.  This is made from Chrysanthemums, but don't let that fool you.  It's quite harmful to beneficial insects, like bees and ladybugs, so only use this as a last resort.


Plants to improve indoor air quality


In 1989 NASA tested common houseplants for their ability to remove common indoor air pollutants, like trichloroethylene, benzene, and formaldehyde. Wait, are these things actually in my home? Yes, they're there with other yucky chemicals, like xylene and ammonia, and they come from very common things like attic insulation, carpet adhesive, paint, wood varnish, paper products, foam in mattresses and furniture, laminate floors, cleaners, printing ink, leather....and fertilizers*. Ok, back to our topic! Indoor air pollution is a problem, especially because newer, energy efficient buildings are tightly sealed, therefore, the air pollutants are trapped inside with nowhere to go, resulting in indoor air quality that is often worse than outdoor air quality.

Major takeaways from the NASA study


  1. All the plants tested removed some air pollutants
  2. Some plants remove some chemicals better than others
  3. There is some link between the removal of toxins and the microbes in the soil* (Fun fact: Did you know soil microbes can adapt to use these air pollutants as food?!)
*Remember me saying it's a good idea to use organic fertilizers? Conventional, synthetic fertilizers harm soil microbes and can contribute to air pollution.

Top 10 houseplants for beginners

This is my updated 2021 list of plants that are low maintenance and forgiving of mistakes, in no particular order.
  1. ZZ plant
  2. Snake plant/mother-in-law's tongue - available in many colors
  3. Pothos ivy
  4. Spider/airplane plant
  5. Philodendron
  6. Hoya
  7. Pilea peperomiodes
  8. Syngonium
  9. Diffenbachia
  10. Monstera deliciosa
    ZZ plant from Wikipedia
    Snake plant via proflowers.com
Pothos ivy from Wikipedia

Spider plant from Wikipedia

Split-leaf philodendron from Lowe's

 15 houseplants for newbies to stay away from


These plants are not difficult -- many people will tell you they're easy -- but they're on this list if they're unforgiving, challenging to water, picky about soil, or for other reasons listed below.

  1. Ficus (F. benjamina, F. lyrata, etc.) - They tend to shed and it's difficult for less experienced plant lovers to decipher normal shedding from problem shedding.
  2. Orchids - Too many variables with potting medium, container type, species, etc.
  3. Palms - Not forgiving of over watering. Bugs.
  4. Ferns - Not forgiving and some are messy.
  5. African violets - Finicky about watering. Rot easily.
  6. Peace lily (Spathiphyllum)- Once they wilt, they look ugly forever.
  7. Cacti/succulents - Super easy outdoors, but they tend to stay too wet for too long indoors. This includes string of pearls, string of dolphins, string of hearts, or outdoor succulents.
  8. Begonias - Watering issues, rots easily.
  9. English ivy (Hedera) - Spider mites, root rot, easy to overwater.
  10. Crotons - Spider mites common and hard to see, watering issues, root rot.
  11. Nerve plant (Fittonia) - Watering issues, root rot.
  12. Polka dot plant (Hypoestes) - Watering issues, root rot.
  13. Creeping fig ivy (Ficus) - If it dries out once, the whole plant goes crispy.
  14. Flamingo flower (Anthurium) - Unpopular opinion, but they're picky about soil moisture and drainage.
  15. Air plants - Don't get me started. :)

    Bonus: Mixed planters/dish gardens - Too hard to keep all plants happy together.


Quick Recap!


  1. Lighting - bright, indirect
  2. Fertilizer - regularly, using organic all purpose & seaweed
  3. Water - let soil dry out a little (sometimes a lot) between waterings
  4. Potting soil - always buy good quality
  5. Containers - with drainage holes
  6. Repot newly purchased plants into a larger container
  7. Houseplants improve indoor air quality
  8. Treat pests/diseases with least toxic option
  9. Try to figure out the root of problems, instead of just treating symptoms
  10. Stick with easy plants until you are more experienced.  A green thumb just means you've killed enough plants to become a pro!  


Updated August 25, 2021 


For information about private consultations in the Austin area, text GARDENHELP to (512) 540 - 8785

December 13, 2018

How to Dust Houseplants Like a Pro


Dusting houseplants is not easy, and if you have them you probably know this, but -- I think I have finally figured out the best way.  I just discovered the "Holy Grail" for dusting houseplants.

Houseplants get dusty, just like everything else in a house, but they are such a pain to clean!
Those leaf shine sprays make the leaves look shiny, but they're full of yucky chemicals and they're terrible for your plants.  And ultimately, the dust is still there, just under a shiny film.

If you've been unfortunate, you may have learned the hard way that the leaf shine gets hot when exposed to sunlight and burns plant leaves.

This is not a sales pitch, but many of you probably don't know that outside of The Plant Chick social media/blog, I am a also Norwex consultant.  (If you're wondering "What is NORWEX?", click here.)
I have never shared this because it hasn't been plant-related until today.

What is it?

The Norwex Dusting Mitt and the Norwex Envirowand duster.


How to use them

Simply hold and support the leaves and stems from underneath with your hand inside the Dusting Mitt, then lay the chenille "fingers" of the Envirowand duster against the top of the leaves and while applying gentle pressure, wiggle it side to side. 

This gets the dust off without breaking delicate leaves and stems, and any dust that falls off the Envirowand gets caught in the Dusting Mitt.  If that doesn't do the trick, you can always use the Dusting Mitt wet.
Just rinse the dusters and hang them to dry for later, and when they're really soiled, toss them in the laundry.


Interested in other green cleaning tips?  Want to learn how it's possible to clean with just water?
Click here!


Follow The Plant Chick on Facebook and Instagram for more gardening tips and pics from an experienced horticulturist and beekeeper.
You can subscribe to this blog by e-mail or by RSS feed for free.
Subscription options are below The Plant Chick logo near the top left side of the page.


(If you're on a mobile device, you may need to first go to the desktop version by using the link near the bottom of the blog.)


#theplantchick #asktheplantchick #gardeningdemystified


September 14, 2018

What's a Chimera?

This picture was sent to me by my friend Keith who is a garden center manager in the Austin area.


This plant phenomenon, which can also happen in animals and people, is called chimera/chimaera. A chimera can occur when a mutation causes a group of cells to grow differently from the tissue around it.

Sometimes this mutation causes the plant to display a different phenotype (white flowers, instead of pink), and other times its visibly undetectable, but still genetically different.

A more common example of chimera is the vertical stripes on a Sansevieria (snake plant) leaf, whose striped area is genetically different from the unstriped portion.


This is why, if you've ever tried to propagate one by a leaf cutting, you'll notice the resulting plant won't have the same color pattern.


(Photo credit: Waylon Arms slideshow "Plant Propagation by Division and Separation")


Follow The Plant Chick on Facebook and Instagram for more gardening tips and pics from an experienced horticulturist and beekeeper.
You can subscribe to this blog by e-mail or by RSS feed for free.
Subscription options are below The Plant Chick logo near the top left side of the page.


(If you're on a mobile device, you may need to first go to the desktop version by using the link near the bottom of the blog.)


#theplantchick #asktheplantchick #gardeningdemystified


September 10, 2018

Beat the Fall Weeds!

The heat of summer takes a heavy toll on most lawns, and by the time fall rolls around many lawns are looking patchy, thin, or dead.  Those thin patches, where the soil is exposed, are prime real estate for fall weed seeds which are looking for a place to put down roots.


A "hack" for the perfect, weed-free lawn


Fortunately there's a food we're all familiar with that can help us out.  It's corn!
All you have to do is dump frozen corn all over your lawn to prevent weeds.  That was a joke.  Seriously, don't do that.

There is actually some truth to the joke because corn is competitive by nature.  Corn plants use something we call "allelopathy" to outcompete other plants that are growing nearby.  (You can read more about allelopathy here on my blog Do Sunflowers Use Chemical Warfare?)

We can harness corn's natural ability by applying CORN GLUTEN MEAL, a protein byproduct of corn processing, to lawns in early fall when the cool season weeds are beginning to emerge.
This also works in the early spring for preventing warm season weeds.


How does it work?


As seeds sprout, they attempt to put down roots and corn gluten meal inhibits the growth of those newly developing roots, killing the vulnerable seedlings as they sprout.  Without roots, the seedling can't soak up water, thereby causing it to wither away.


 <<WARNING>>


Because corn gluten doesn't know the difference between a weed seed and other types of seeds, it's important to exercise caution while applying it.

Corn gluten meal will not negatively affect established plants with deep roots, like your lawn, since it is only applied to the surface of the soil, but it will work just as effectively on freshly planted grass seeds and vegetable garden seedlings as it does on weed seeds, so if you're planning to seed your lawn or start a vegetable garden, be sure to apply corn gluten meal at least 6 weeks in advance, or wait to apply it after your new grass or vegetable plants are well established.


For best results


If you're applying corn gluten meal in granular form, you'll want to water it immediately after application to get the corn gluten to wash into the top layer of soil, but do not water that area again for 7 days.

If you're using Green It Organic Weed Preventer, water is part of the application, so there are no additional steps needed, but again, do not water the area again for 7 days.

Applying water within the first 7 days can dilute the corn gluten in the soil enough to make it ineffective.  This dry period is an essential part of killing those sprouting weed seedlings.

Studies have shown that higher concentrations of corn gluten meal are more effective than lower concentrations, so be sure to follow the application recommendations and don't be tempted to skimp on the application. 

20 lbs per 1000 SF is generally the recommended application rate which yields the best results.


When to apply


Timing is critical when using corn gluten meal to prevent weeds.  In order to get the best results, it must be applied the week that weed seeds are emerging.  Applying too late means that weed seedlings won't be affected, but applying too early means the corn gluten will wash out of the soil before it has had a chance to work.


Other benefits of corn gluten meal


Having a thick, healthy lawn is the best defense when it comes to winning the battle against weeds, and corn gluten meal helps with this as well.  Most corn gluten meal is around 10% nitrogen, which is considered very high for an organic fertilizer, and this boost of nitrogen helps the top part of your lawn grow, essentially choking out the competition, weeds.


While Corn Gluten Meal doesn't prevent every weed in every place -- no herbicide does -- the benefits of this weed preventer which doubles as a fertilizer make it a top choice for organic gardeners.


Follow The Plant Chick on Facebook and Instagram for more gardening tips and pics from an experienced horticulturist and beekeeper.
You can subscribe to this blog by e-mail or by RSS feed for free.

Subscription options are below The Plant Chick logo near the top left side of the page.

(If you're on a mobile device, you may need to first go to the desktop version by using the link near the bottom of the blog.)


August 17, 2018

Tips for Fall Gardening


One of the downsides to living in a hot area like Austin, Texas is that our spring gardens die quickly when it becomes hot, which is early, like around May-June. If the heat doesn't make the garden plants wither away, the bugs associated with the heat will finish the job.

The upside is that we have a fantastic fall growing season. The weather is perfect and plants flourish! We also get a lot of rain in the fall, so watering the garden is less of a chore, and there aren't as many problem bugs.

While writing this I'm assuming you, the reader, already have a garden space. If you need help selecting a location for a new garden or preparing the soil for a new garden, click here [COMING SOON].


How do you know when to start your fall garden?


There are two important factors to consider. Starting too early, when it's very hot, could be disastrous for your young vegetable plants, but starting too late means that cold temperatures could kill your garden before it's time to harvest.

There's nothing worse than seeing a tomato plant loaded with green tomatoes when you're expecting your first killing frost. (Unless you like eating green tomatoes. In that case, pick them and carry on!)


Planting dates for Texas


If you're in Texas, Texas A&M has split the state up into 5 regions, based on the coldest annual temperature.  Here's their list of recommended planting dates for each fall crop.

 TEXAS A&M RECOMMENDED FALL PLANTING DATES


Here in the Austin area we're "Region III", meaning our coldest temperature of the year is usually between 10 and 20 degrees F. We don't have many days that cold, and some winters it doesn't ever get that cold, but that's about as bad as it ever gets.


Planting dates outside of Texas


If you're not in Texas, don't worry, here's a tip to help you decide when to plant. Find out the average date of your first "killing frost".  If you live in a very cold place, this might be in September, but in the Austin area it's often November 5th-15th.  Sometimes earlier in the cool season we'll have a light frost that causes some damage to tender plants, but it doesn't kill everything. We're not talking about that.  We're talking about a hard freeze that kills most perennials and tender plants all the way to the ground.


Clues on the seed packet


Now look at the seed packets of whatever it is you'd like to grow and you'll notice that most seed packages have "Days to Maturity" listed on the package.  Take this radish, for instance.  On the bottom left side of the seed package you'll notice that this variety requires 22 days, or about 3 weeks, for reaching maturity. 


What's the significance of "days to maturity"?


That's simple.  You want to make sure you allow enough time between the day you plant your seeds and the day you expect your first freeze.  You need enough time to allow for seed germination (sprouting) and the number of days to maturity.  


For instance, if you want to plant tomato seeds, but you only have 3 weeks before your first hard freeze, you're better off saving your seeds for spring because most tomatoes require 65-85 "days to maturity" (plus however long it takes the seeds to sprout), therefore, 3 weeks would not be enough time.

This is less significant for some of the cool weather crops, like leafy greens and broccoli, which can withstand cold and freezing temperatures in moderate climates like central Texas.


How do I start my fall garden seeds?


Unlike starting your spring garden seeds, which is usually done indoors, most of your fall garden seeds can be started outdoors.  Some plants that don't mind the heat can be seeded directly in the ground, but I like to start most of my fall garden seeds in containers so I can control how much heat and sun exposure the fragile seedlings receive. 


Popular seed starting methods


  • Direct Seeding
    • Advantages: Easy. Wet the soil and put in the seeds. Done. 
    • Disadvantages: Difficult to control the fragile seedlings' sun and heat exposure.  You can't move them into a protected location if they start getting cooked in the sun, or if they're about to get pounded by a heavy rain storm.  Tiny seeds that are planted just below the soil surface are easily washed away when watered or when it rains, or sometimes they sink so deep that the seeds can't sprout and survive.
    • This is a good option for large seeds, like squash and cucumber.
  • Peat Pellets
    • Advantages: Cheap and available at most retailers.  You can plant the pellet directly into the ground later.
    • Disadvantages: Difficult to control soil moisture.  It seems like peat is either saturated or dry, and it's hard to keep peat an ideal, in-between moisture level.  Since there is no container, the roots of the fragile seedlings are exposed to the elements.  
    • This is my least favorite method for seed starting.
  • Peat Pots
    • Advantages: Cheap and readily available.  You can plant the peat pot directly into the garden soil later.  Any potting soil can be used.
    • Disadvantages: Like the peat pellets, the roots are exposed to the elements.  Since the peat is wrapped around the soil it wicks away soil moisture as it dries out. 
    • This is a good option if plastic pots aren't available.
  • Growers Tray
    • Advantages: You can start a lot of seeds in a small space.
    • Disadvantages: More work later.  Higher seedling mortality rate.  You have to dig up each fragile seedling without damaging its root system and transplant them into larger pots or into the ground.
    • Not recommended for beginners, unless you have a greenhouse.


My preferred seed starting method

  • Growers Tray with Plastic Pots
    • Advantages: The plastic pots retain soil moisture and protect delicate roots better than peat.  Sun and heat exposure are easily modified by moving the tray.  The trays and pots are reusable for many years if stored in a garage or shed.  Any potting mix* can be used.  (Note: As I always tell my customers, when it comes to potting soil, you get what you pay for.)
    • Disadvantages:  Like most of the other methods (except for direct seeding), you have to transplant the seedlings into the garden later.  I personally don't consider this a down side because by that point you have protected the seedlings and allowed them to grow a strong root system.
    • This is my preferred method for seed starting. 


Helpful products for seed starting


Heat mats results in faster germination, higher germination rates, and stronger root systems.  In other words, seeds sprout faster, more of them sprout, and more of them survive.  Heat mats aren't as crucial for fall seed starting, but they're very helpful for any seedlings you start indoors, like tomatoes and peppers that you plant for your spring garden.

The mat is placed underneath a growers tray to give seedlings "bottom heat" which help encourage root development and growth.  If you're going to use a heat mat, be sure to use a grower tray without drainage holes, or place one underneath your draining tray to prevent the mat from getting wet.

Peat pots can be filled with your favorite potting mix for seed starting and then planted directly into your garden soil later.


Grower trays are a versatile item for seed starting.  You can start the seedlings directly in the tray or you can use it to hold peat pots, peat pellets, or plastic grower pots.


I personally prefer to use a
growers tray with plastic grower pots for my seed starting.  The seedlings don't dry out as quickly as they do in a peat pellet/pot.  If stored out of sunlight when not in use the pots and trays are reusable for a few years.


A note about potting mix


You don't need special
potting mix for seed starting, as long as you use a good quality potting mix.  With potting mix, you get what you pay for, so don't even buy the cheap stuff unless you're just filling a hole that your dog dug.  
I prefer to use an organic mix if I'm planting seeds for edibles.  My favorite right now is New Earth Top Shelf Potting Mix, but it can be hard to find outside central Texas.  If you're local, you can get it at almost any H-E-B that has a garden section in front of the store.


Follow The Plant Chick on Facebook and Instagram for more gardening tips and pics from an experienced horticulturist and hobby beekeeper.

SUBSCRIBE by e-mail of feed so you don't miss future blogs.
Subscription options are below "The Plant Chick" logo near the top left side of the page.  (If you're viewing this from a mobile device, you may need to first go to the desktop version using the link near the bottom of the blog page.)

How to Care for your New Plant Purchase

 Hello!  If you've landed here, you've probably made a purchase or received a gift from The Plant Chick . So, what's next?!  If ...

Popular Posts